
3分鐘的時間,掌握以下 2 個重點,光速學會 Shopify CMS頁面編輯器操作
Step 1 進入商店後台
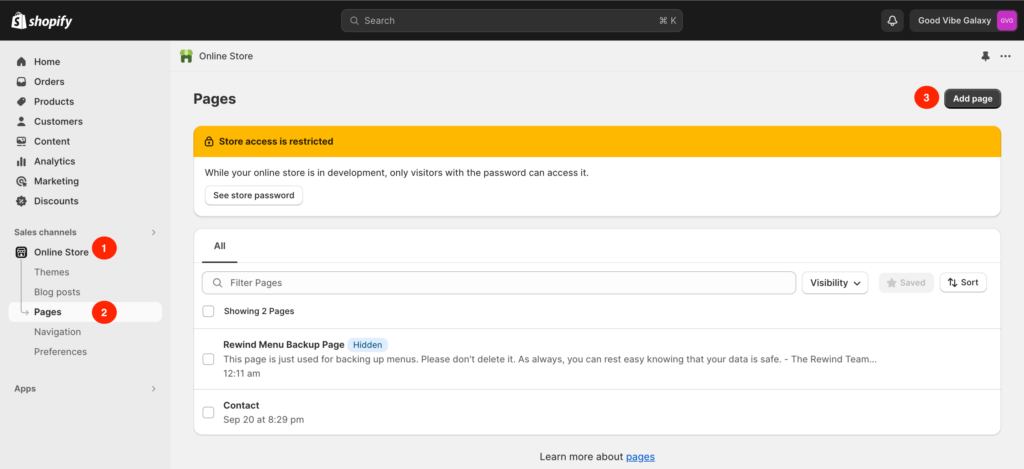
- 找到 Sales channels – Online Store
- 點擊 Pages Tab
- 點擊 Add page 按鈕新增內容頁面
Step 2 編輯內容頁面資料
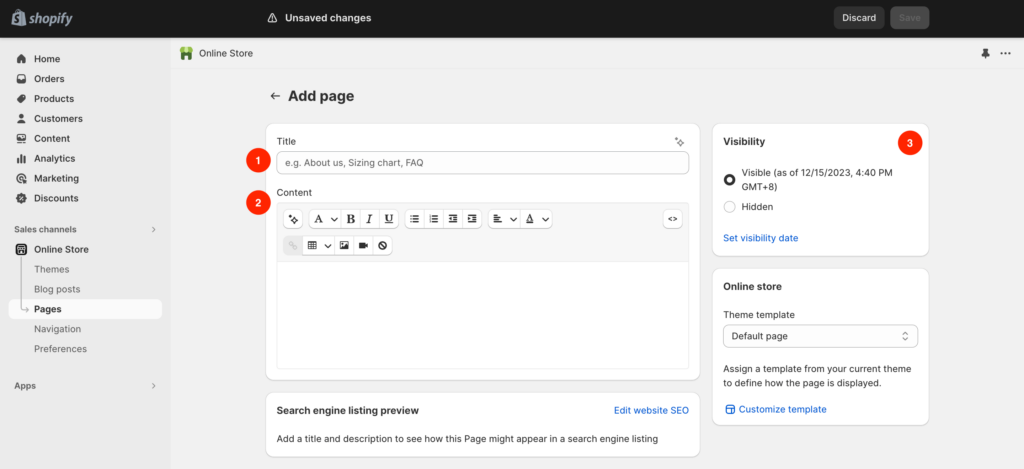
1. Title:內容頁面標題
2. Content:內容頁面資料編輯
3. Visibility:內容可見設定
- Visible:可見的
- Hidden:隱藏
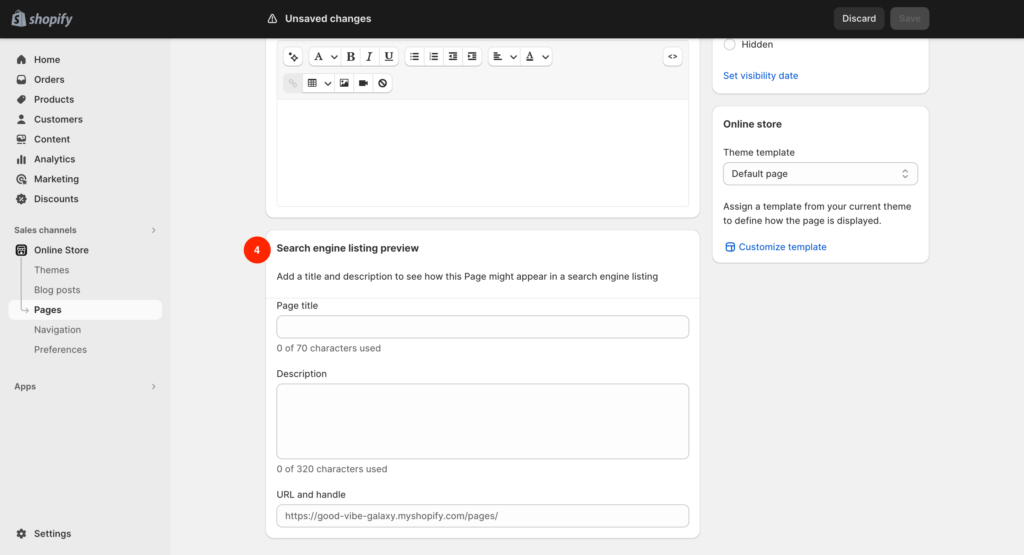
4. SEO 優化
- Page title:google 搜尋後該頁面 title 資料
- Meta description:google 搜尋該頁面的描述資料
- URL handle: google 搜尋該頁面的 URL 尾綴設定
Shopify 的CMS靜態頁面編輯器設定就是這麼簡單!想了解更多 Shopify 相關的資訊可以參考我們的部落格專欄,如有Shopify 電商網站開發的需求,好感數位很樂意為您服務,立馬填寫諮詢表單讓助您一臂之力開啟屬於自己的電商事業吧!
資料來源