3分鐘的時間,掌握以下4個重點光速學會設定 Shopify 選單
Step 1 進入商店後台
![2024 最新 Shopify 選單管理 - 選單設定操作說明 1 shopify-documentation-menu-management-image-1](https://goodvibe.tw/wp-content/uploads/2023/09/Screenshot-2023-09-20-at-9.30.09-PM.png)
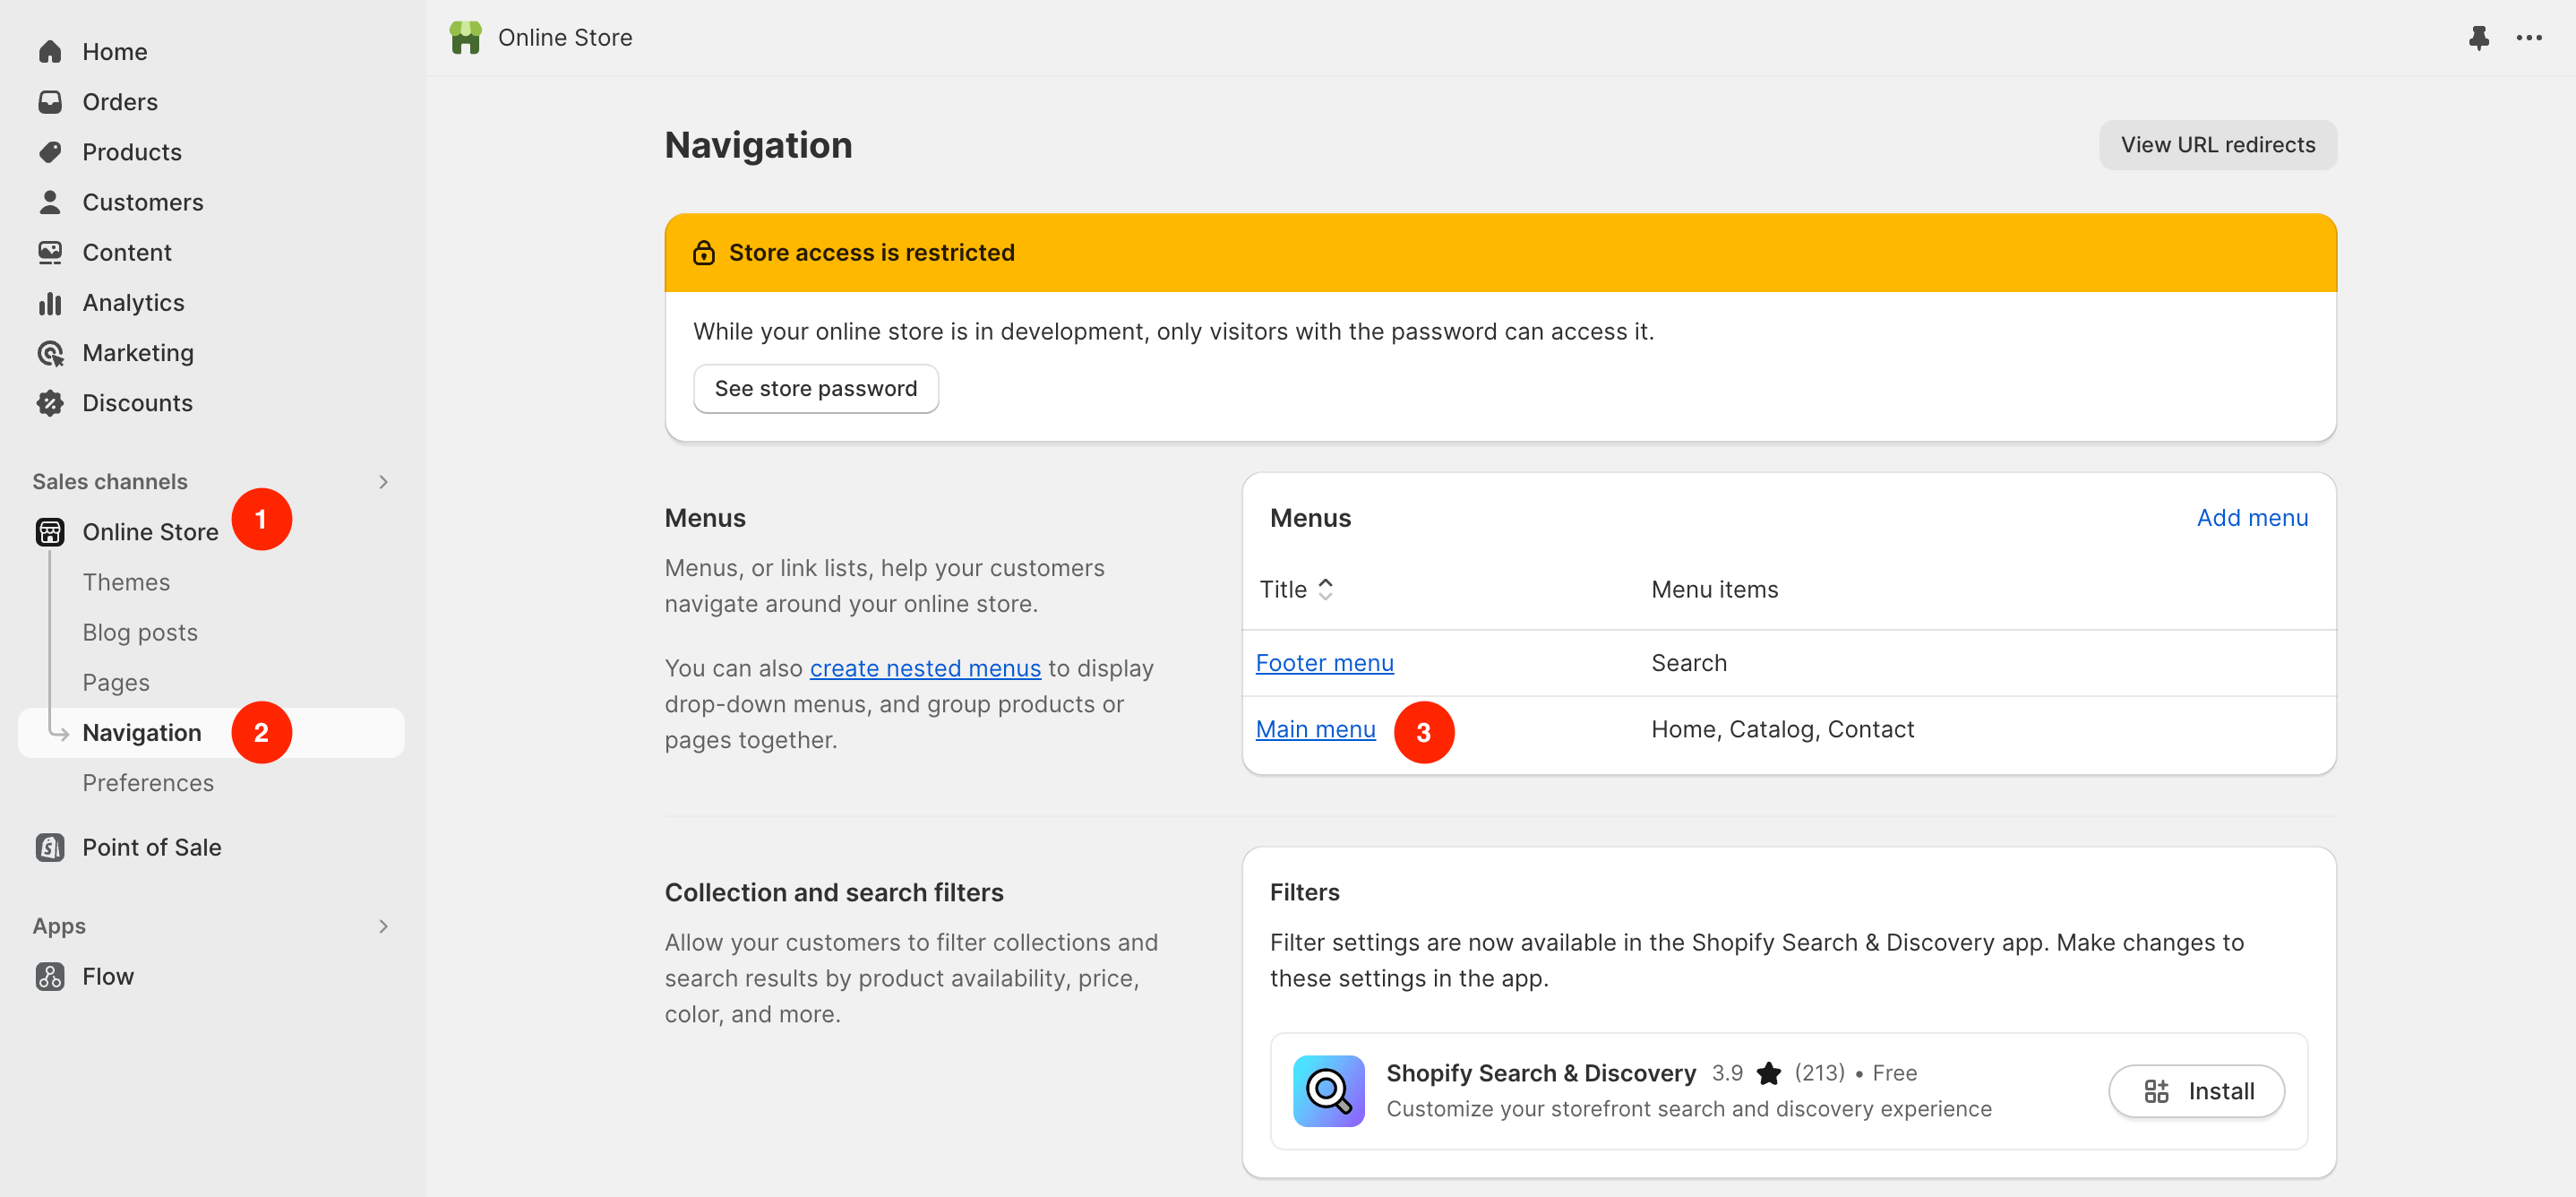
1. 點擊左下角 Online Store
2. 點擊 Navigation (導覽列)
3. 點擊 Main menu (頁首選單)
Step 2 編輯選單資料
![2024 最新 Shopify 選單管理 - 選單設定操作說明 2 shopify-documentation-menu-management-image-2](https://goodvibe.tw/wp-content/uploads/2023/09/Screenshot-2023-09-20-at-9.34.05-PM.png)
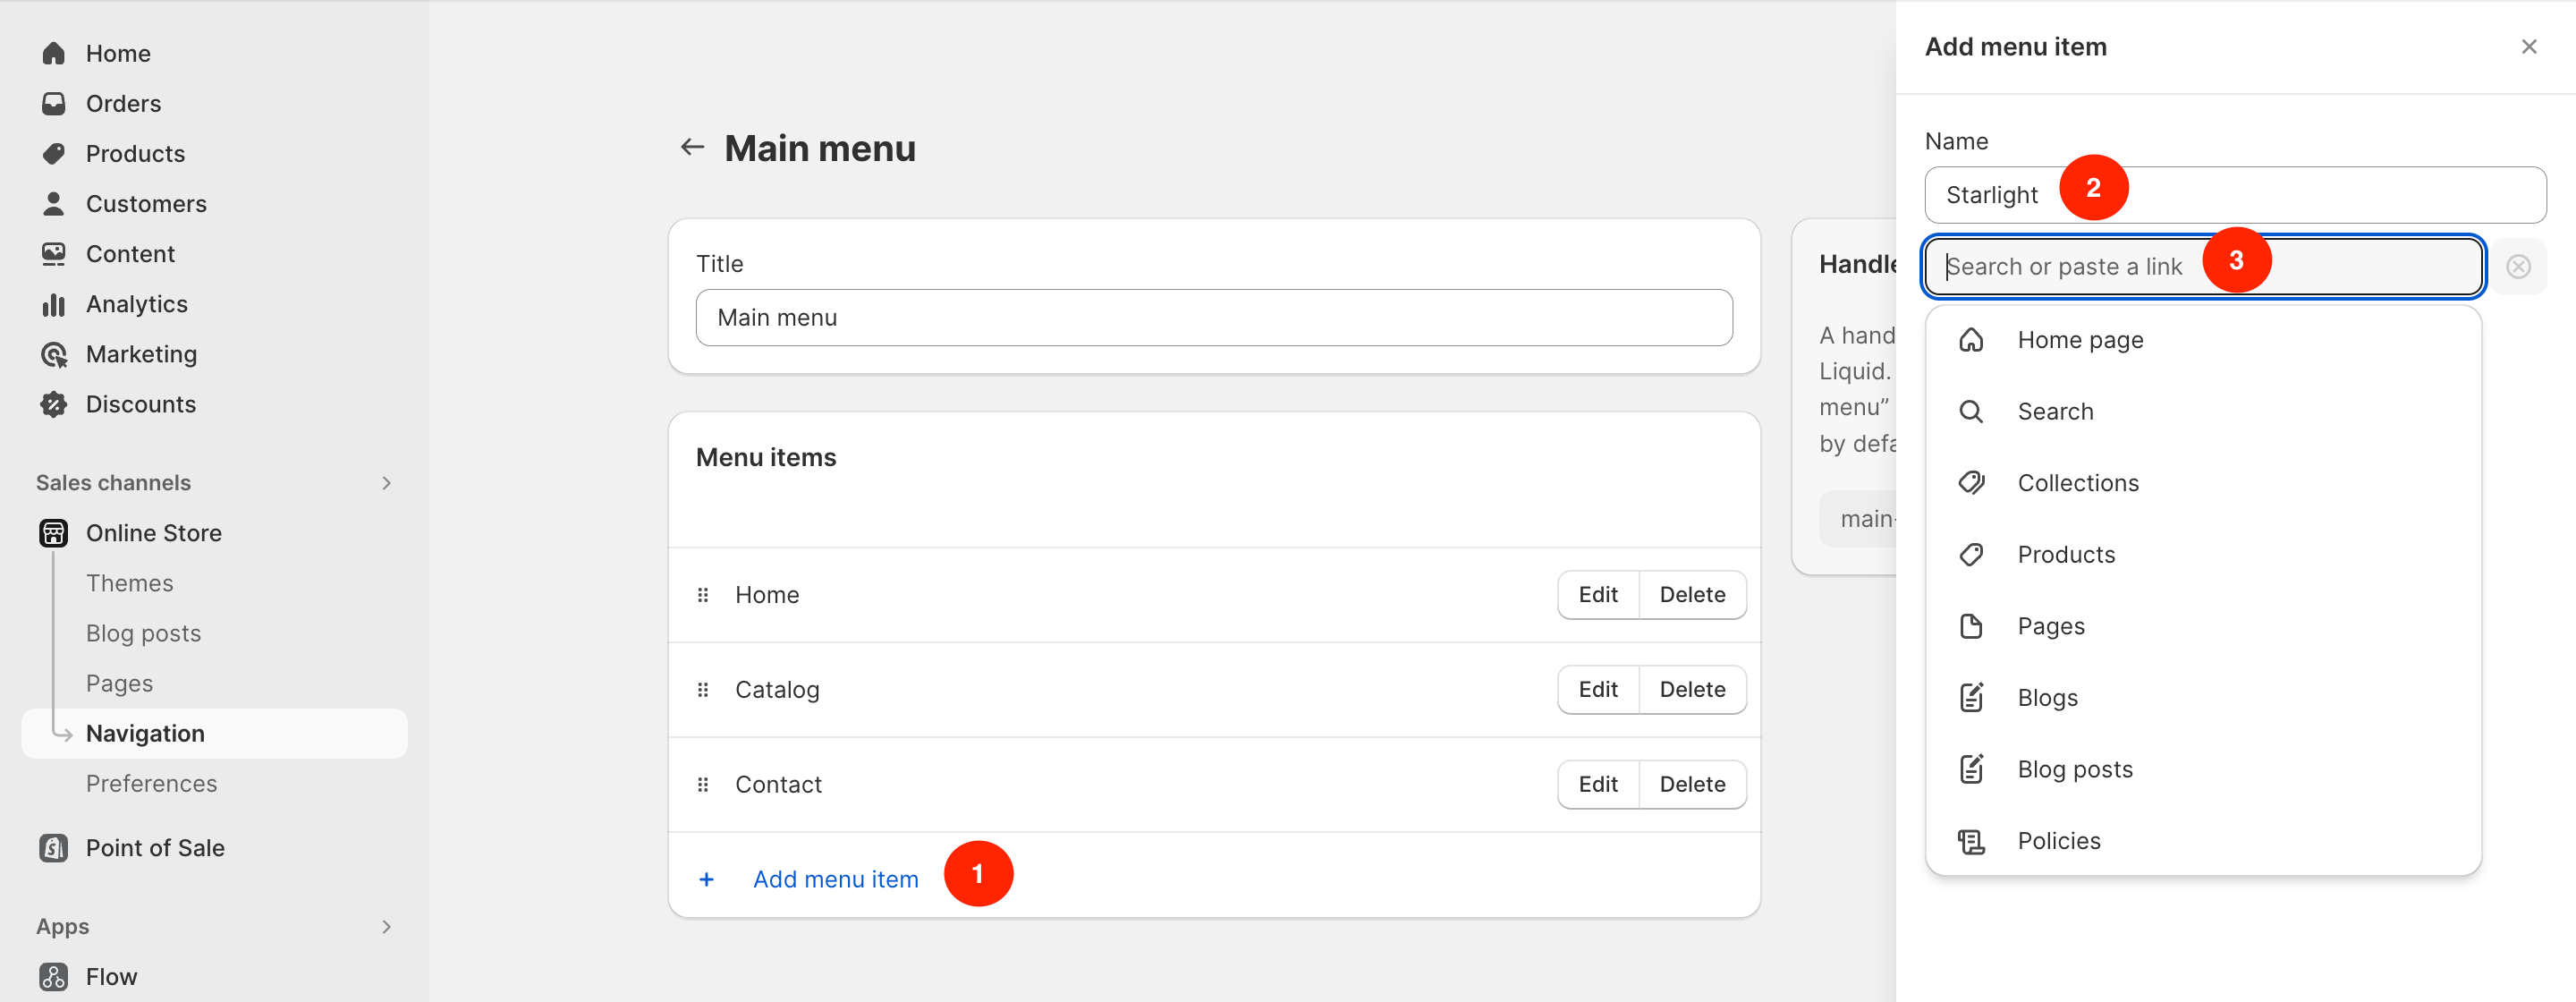
1. Add new item:新增選單
2. Name:新增選單名稱
3. Search or paste a link:選擇選單類型 or 貼外部連結
![2024 最新 Shopify 選單管理 - 選單設定操作說明 3 shopify-documentation-menu-management-image-3](https://goodvibe.tw/wp-content/uploads/2023/09/Screenshot-2023-09-20-at-9.58.13-PM.png)
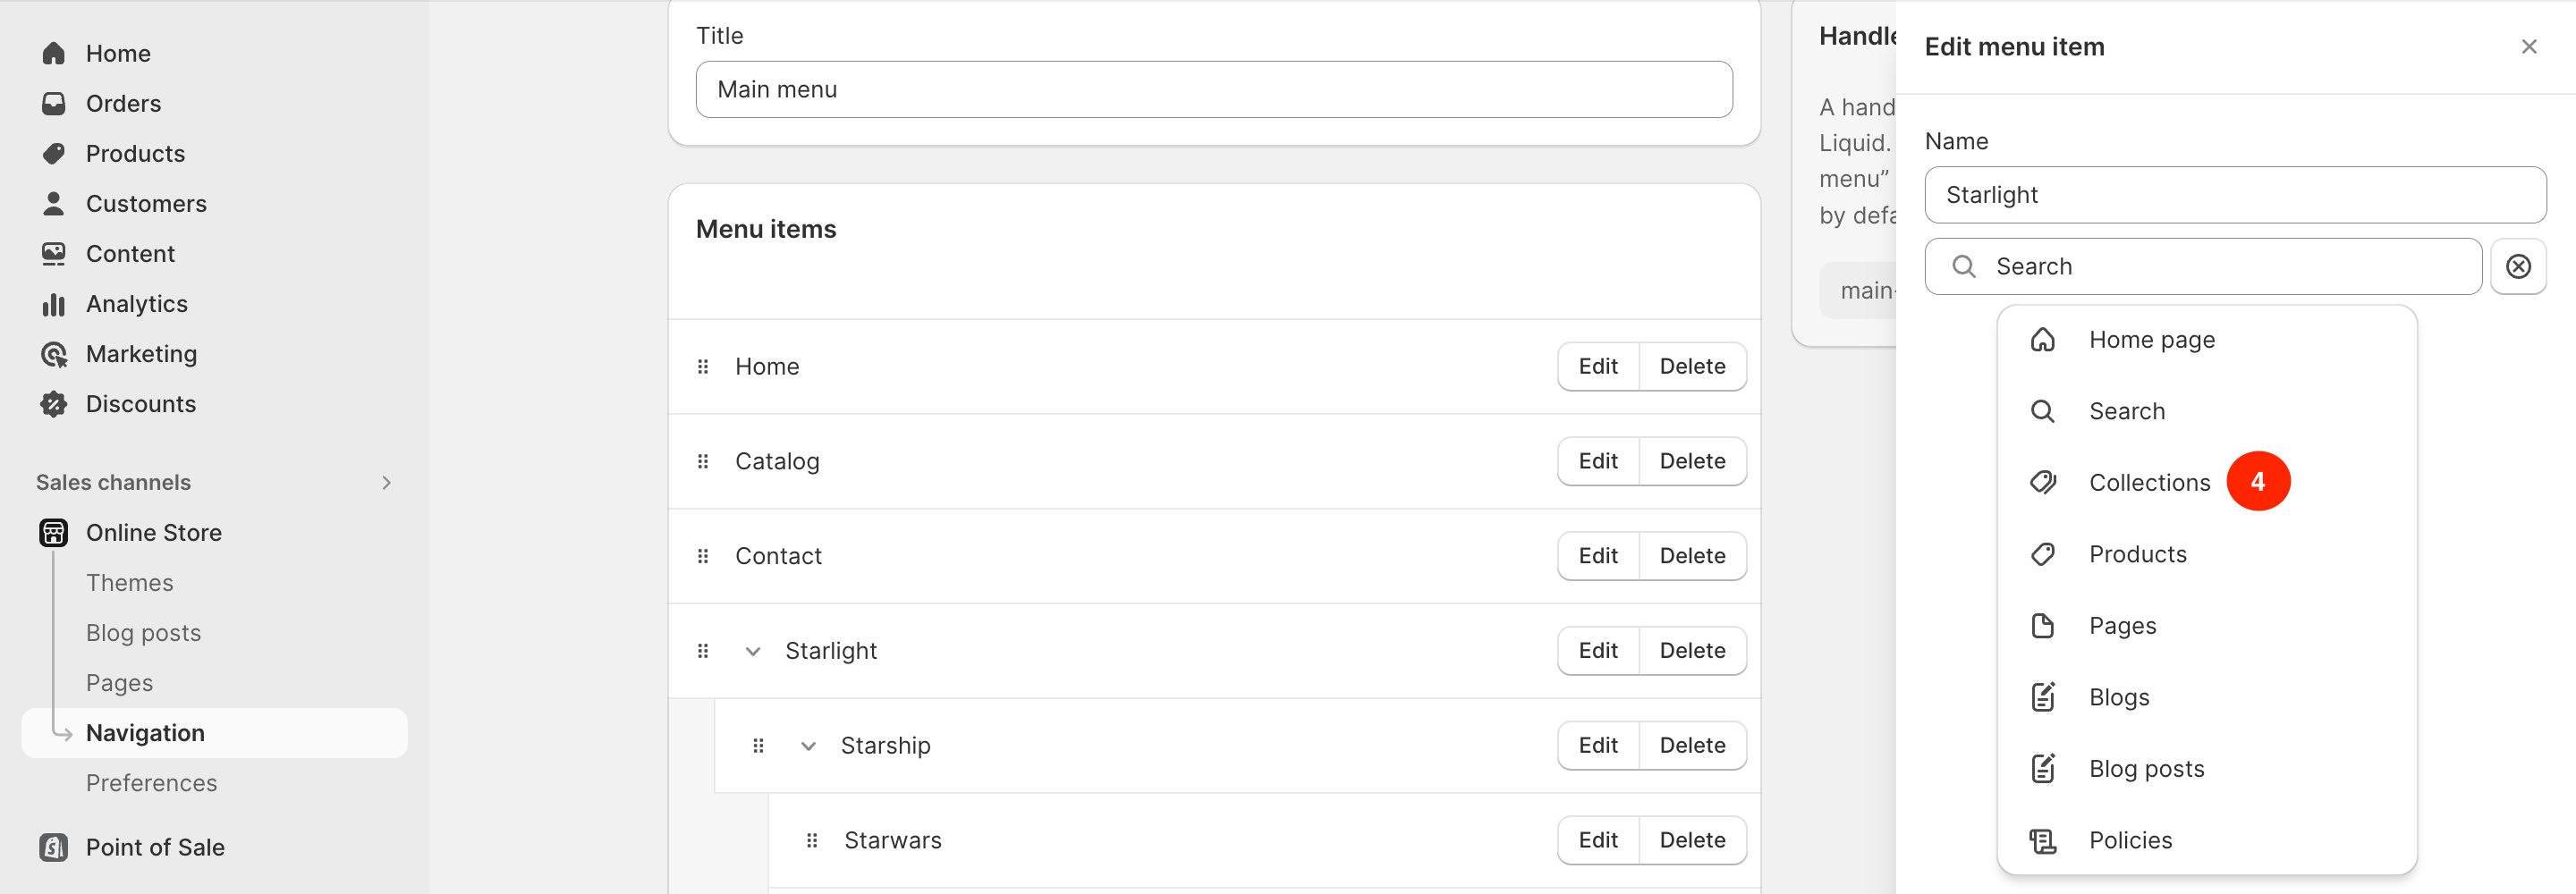
4. 以選 Collections(產品目錄) 類別為例
![2024 最新 Shopify 選單管理 - 選單設定操作說明 4 shopify-documentation-menu-management-image-4](https://goodvibe.tw/wp-content/uploads/2023/09/Screenshot-2023-09-20-at-9.58.58-PM.png)
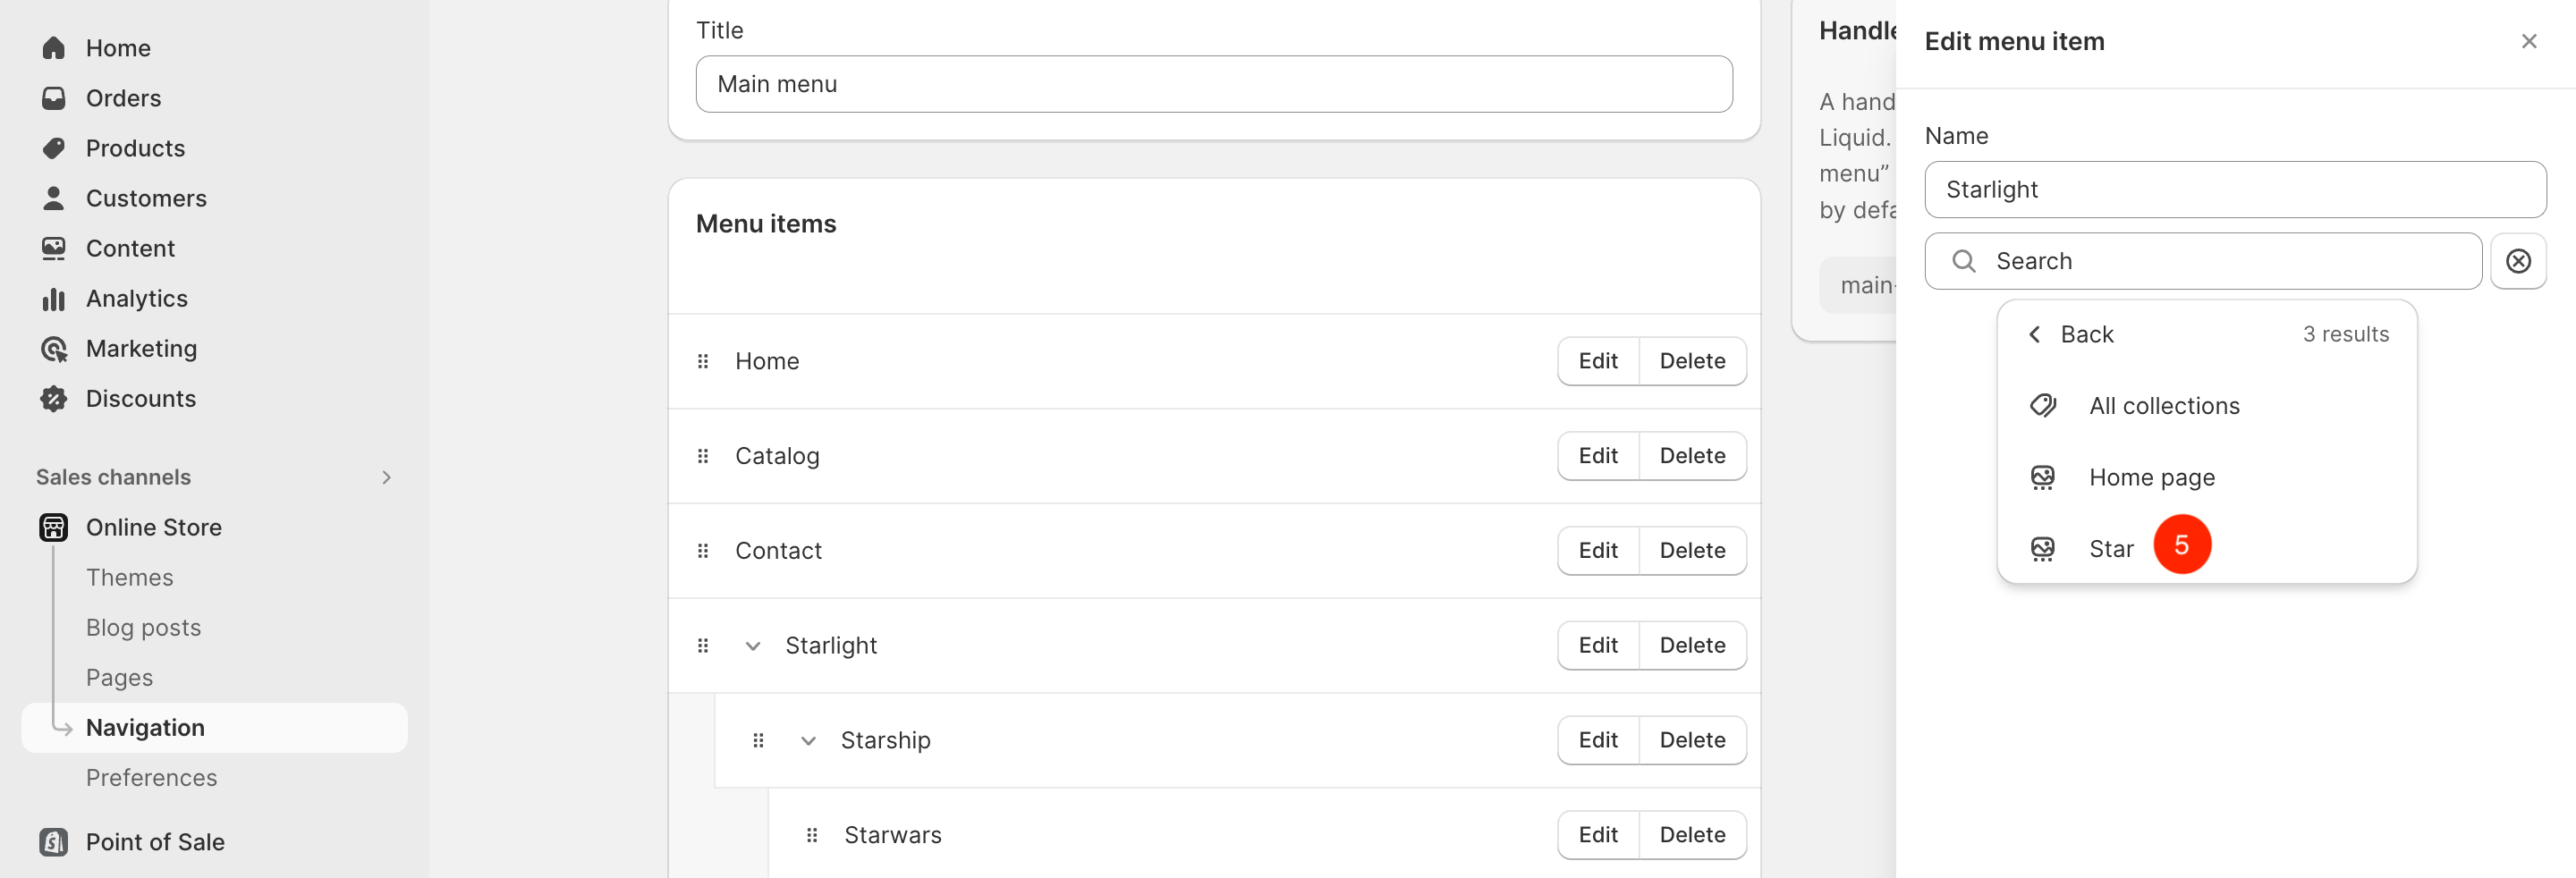
5. 選擇指定 Collections(產品目錄)
Step 3 選單結構建置
![2024 最新 Shopify 選單管理 - 選單設定操作說明 5 shopify-documentation-menu-management-image-5](https://goodvibe.tw/wp-content/uploads/2023/09/Screenshot-2023-09-20-at-9.40.28-PM-1.png)
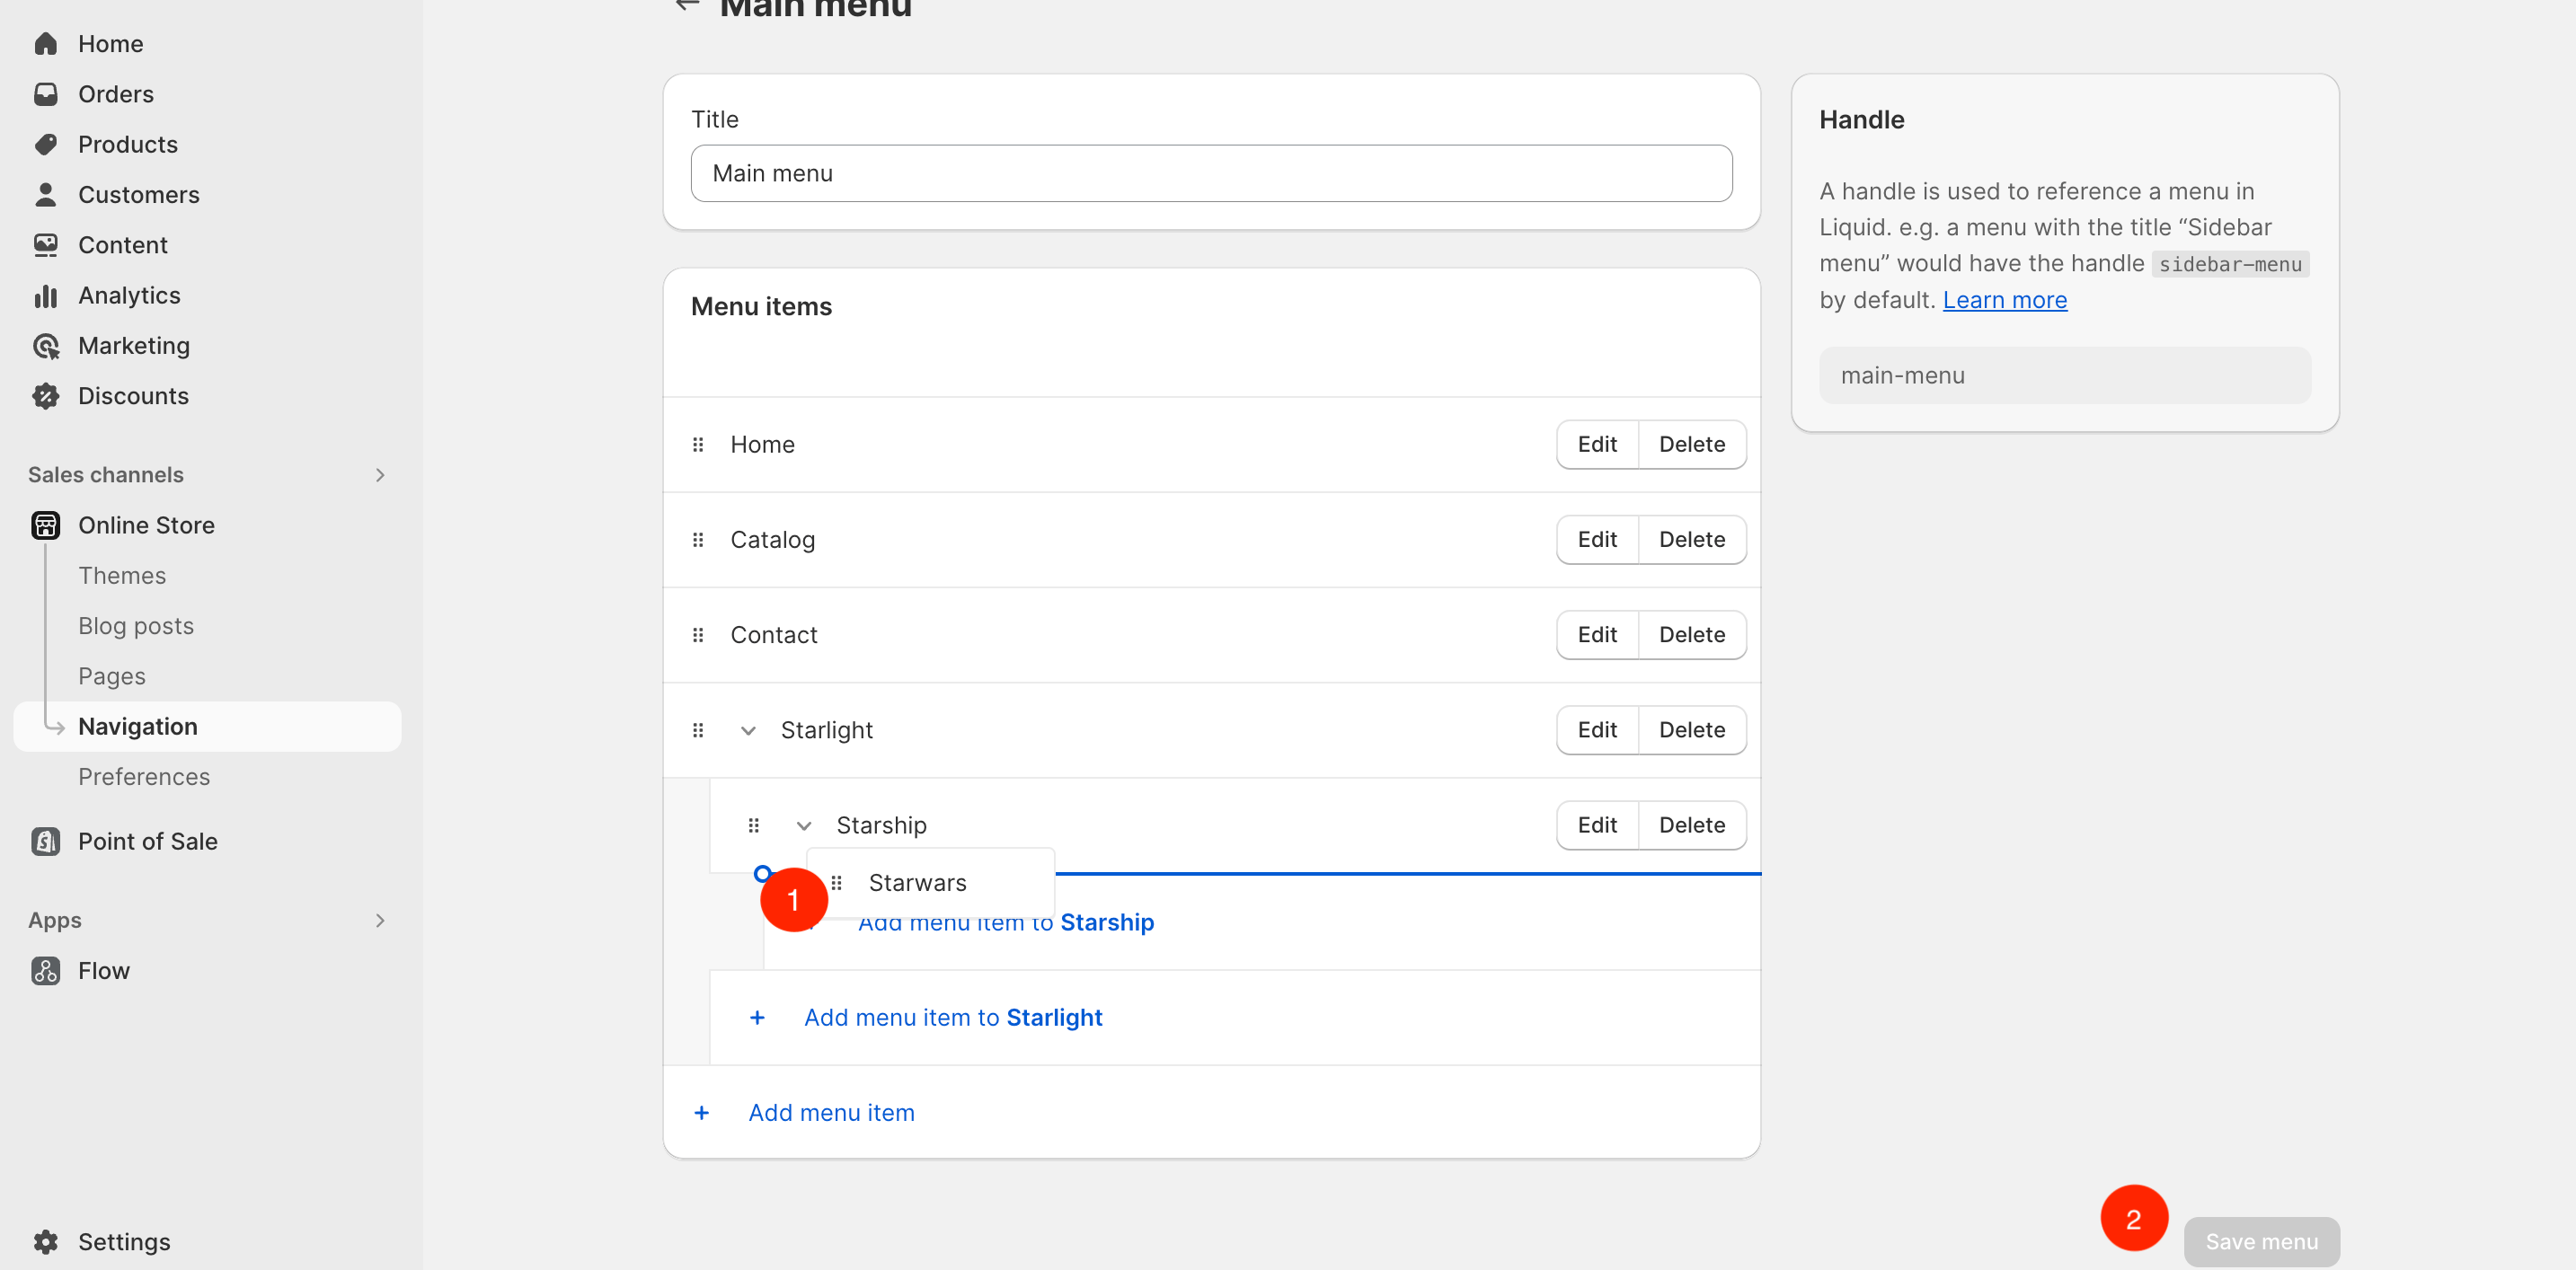
1. 點擊選單左側點點,進行選單位置拖曳,已建置選單結構
2. Save menu:儲存選單設置
Note:Shopify 選單層級最多能向下設定2層
成果顯示
![2024 最新 Shopify 選單管理 - 選單設定操作說明 6 shopify-documentation-menu-management-image-6](https://goodvibe.tw/wp-content/uploads/2023/09/Screenshot-2023-09-20-at-9.44.33-PM.png)
依據教學的設定,成果如上圖,Footer (頁尾) 選單的設置的邏輯一致,唯一的差別只在於點擊 Store – Navigation 將原本選擇的 Main menu 改選 Footer menu 即可!
Shopify 的選單設定就是這麼簡單!想了解更多 Shopify 相關的資訊可以參考我們的部落格專欄,如有Shopify 電商網站開發的需求,好感數位很樂意為您服務,立馬填寫諮詢表單讓助您一臂之力開啟屬於自己的電商事業吧!
資料來源